Accurate World Cup Betting Tips for Beginners
Other |
2025-08-21 03:21:10
Connecting your Canon printer to WiFi is one of the best ways to simplify your printing experience. With wireless printing, you can send documents from your computer, phone, or tablet—without needing to plug in cables or sit next to the printer. Whether you just got a new Canon printer or need to reconnect it after a router change, this step-by-step guide will walk you through the process.
CLICK HERE FOR LIVE CHAT WITH US Or Contact +1-888-272-8868
Let’s get your printer online and ready to go!
Before diving into the setup, make sure you have the following:
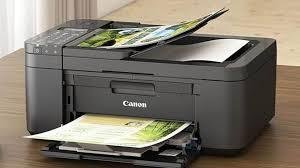
A Canon wireless printer (Inkjet or Laser, like PIXMA, MG, TS, TR, or MAXIFY series)
A WiFi network (with the password handy)
A device to complete the setup: computer, smartphone, or tablet
The Canon PRINT Inkjet/SELPHY app (for mobile setup)
If your Canon printer has a built-in LCD or touchscreen, the setup process is straightforward using the Wireless LAN Setup feature.
Turn on your Canon printer.
Make sure it’s plugged in and powered up.
Navigate to the WiFi setup menu.
On most models, press the Settings or Setup button (gear icon).
Scroll to Wireless LAN Setup and select it.
Choose ‘Easy Setup’ or ‘Standard Setup.’
Select WiFi Setup > Standard Setup.
The printer will begin searching for nearby networks.
Select your WiFi network (SSID).
Choose your home WiFi from the list.
Enter your WiFi password.
Use the on-screen keypad to type it in.
Double-check for uppercase/lowercase letters.
Wait for the connection to complete.
A confirmation message like “Connected” or “Setup Complete” will appear.
You may see the WiFi icon on the printer screen indicating it's online.
✅ You’re all set! Try printing a test page from your device to confirm it works.
Canon’s free Canon PRINT Inkjet/SELPHY app makes wireless setup easy from your phone or tablet. This is ideal for printers without a screen or if you prefer mobile setup.
Download the Canon PRINT app.
Available on the
Open the app and tap ‘Add Printer.’
Allow the app to access Bluetooth and WiFi if prompted.
Put your printer into Wireless Connect mode.
For newer models: Hold down the Wireless or WiFi button until the WiFi light flashes.
Look for the option in the app or on the printer screen called Easy Wireless Connect.
Connect your phone to the printer’s temporary WiFi.
Your phone will detect the printer and prompt you to connect to it.
It’ll then guide the printer onto your home WiFi network.
Follow the on-screen instructions.
The app will walk you through the rest of the process.
Once connected, your printer will appear in the app.
✅ You can now print photos, documents, and more directly from your phone!
Prefer to set up your Canon printer on a computer? You can do this wirelessly without a USB cable using Canon’s setup software.
Download the Canon setup utility.
Visit the Canon Support website and enter your printer model.
Choose your operating system and download the Wireless Setup Assistant or Easy Setup Software.
Run the installer and choose 'Wireless Setup.'
Start the setup program and follow the on-screen instructions.
Power on the printer and enter setup mode.
Follow the prompts to enable wireless setup mode.
Select your WiFi network and enter the password.
The software will guide your printer onto your WiFi network.
Complete installation and test the connection.
Print a test page or use the Canon software to scan something.
✅ Your printer is now set up wirelessly on your computer!
Make sure the WiFi network is 2.4 GHz (Canon printers typically don’t support 5 GHz).
Double-check the password—it's case-sensitive!
Move the printer closer to the router during setup.
Restart your printer, router, and device if needed.
Ensure your device is on the same WiFi network as the printer.
Disable VPNs or firewalls temporarily during setup.
Try using the WPS Push Button method if your router supports it.
If your router supports WPS, this is a quick way to connect:
Press and hold the WiFi button on your Canon printer until the light flashes.
Press the WPS button on your router within 2 minutes.
The printer will connect automatically. Look for a solid WiFi light.
CLICK HERE FOR LIVE CHAT WITH US Or Contact +1-888-272-8868
After connecting your printer to WiFi, test it out!
Print a status report from the printer menu.
Try printing a photo or document from your device.
Check if the printer shows up in your Printers & Scanners settings (Windows or Mac).
If you change your router or password, your printer will need to be reconnected:
Use the steps above to reset the wireless settings.
Go back into WiFi Setup on the printer or app and select your new network.
If your printer supports Easy Wireless Connect, use that option to re-pair with your device.
Canon makes wireless printing easy—once you're connected, you can print from nearly anywhere in your home, from any device. Whether you're using a control panel, smartphone, or computer, this guide has a method that fits your setup.
If you're still stuck after trying the above methods, Canon’s customer support or the user manual for your model can provide more help. But in most cases, it’s just a matter of a few clicks and a password.