English
 Arabic
 French
 Spanish
 Portuguese
 Deutsch
 Turkish
 Dutch
Dutch
 Italiano
 Russian
 Romaian
 Portuguese (Brazil)
 Greek
Greek
Conductive Carrier Tape Market to Reach USD 1.13 Billion by 2034 Driven by Semiconductor Packaging and Electronics Manufacturing Growth
Other |
2026-07-07 07:59:27
 Social Networth OS
 Creator Commerce
 Launch Startup
 Global News
 Creator Award
 Talkfever App
δες τα όλα
Talkfever App
δες τα όλα

Upgrade to Pro
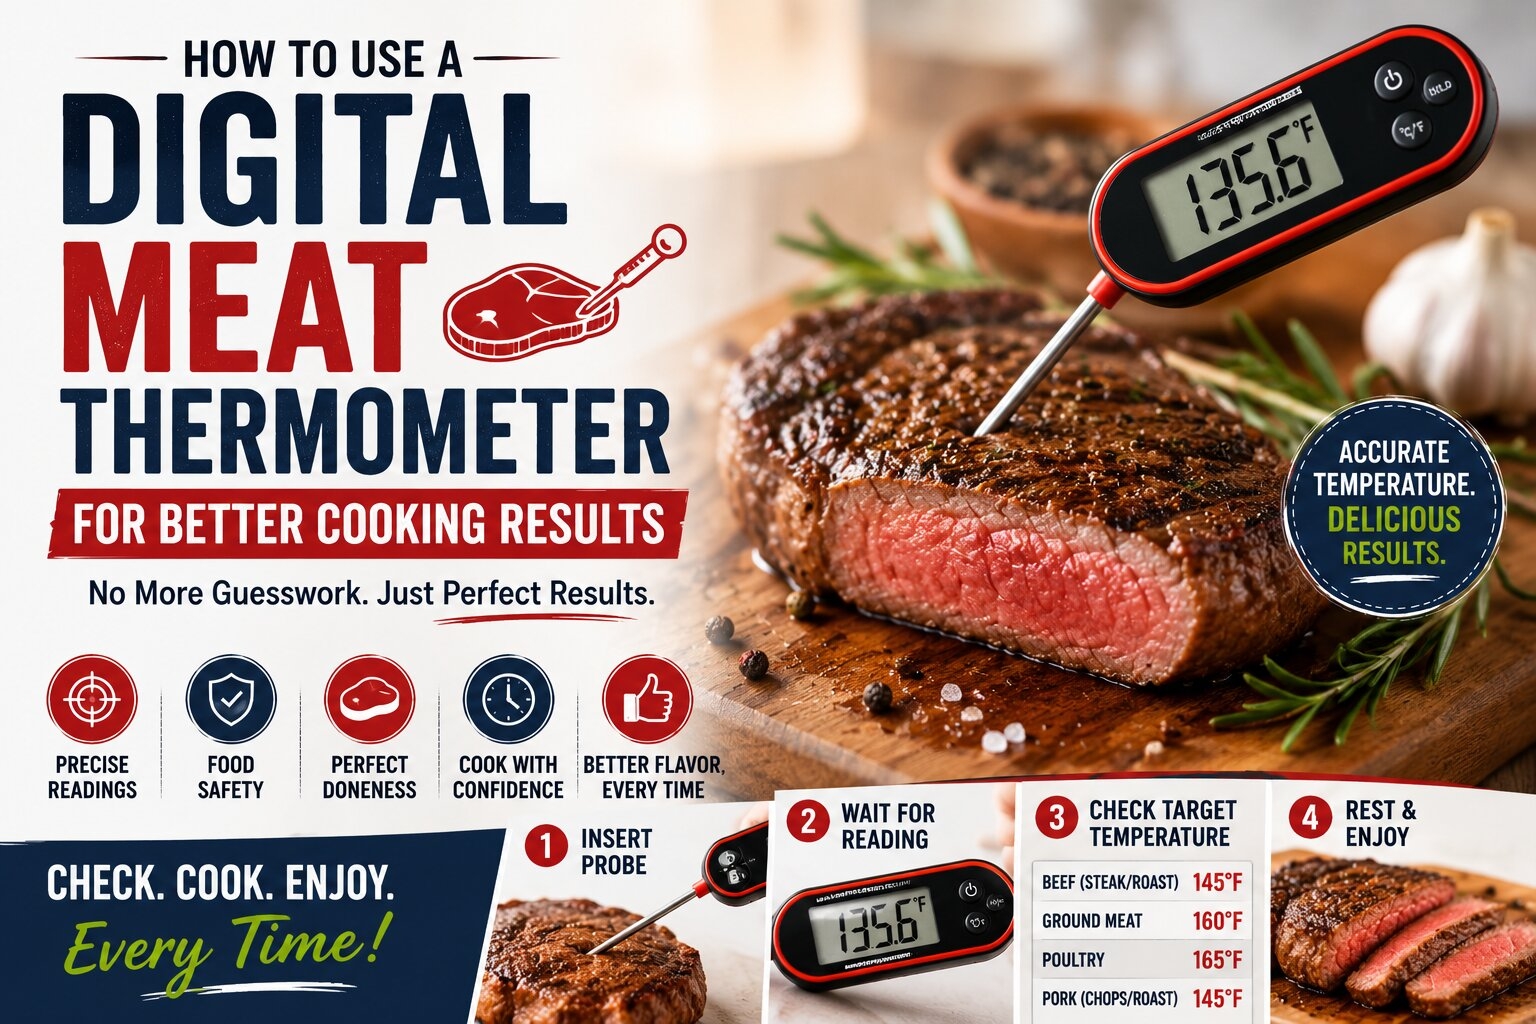
Cooking meat can feel like a guessing game.
You check the color, press the surface with your finger, estimate the cooking time, and hope everything turns out right. Sometimes it works beautifully. Other times, you cut into the meat and discover that it's still undercooked in the center—or worse, you leave it on the heat too long and end up with something dry and tough.
There is a much simpler way to take the guesswork out of the process: measure the internal temperature.
A digital meat thermometer gives you a quick way to check what's happening inside your food instead of relying entirely on appearance or cooking time. It can be especially helpful when you're preparing thick steaks, chicken breasts, roasts, burgers, pork chops, or other cuts where the center can cook much more slowly than the outside.
Using one correctly isn't difficult. In fact, once you get used to checking temperature, it can become one of the easiest habits in your kitchen.
This guide explains how to use a digital thermometer properly, where to place the probe, when to check your food, how to avoid inaccurate readings, and how temperature can help you achieve more consistent cooking results.
Meat doesn't cook at the same rate throughout.
The outside of a steak can develop a beautifully browned crust while the center remains much cooler. A chicken breast can look cooked on the surface while the thickest part still hasn't reached the required temperature.
That's why appearance alone isn't always enough.
The U.S. Department of Agriculture recommends using a food thermometer to verify internal temperatures. For example, whole cuts of beef, pork, lamb, and veal should reach at least 145°F and rest for at least three minutes; ground beef, pork, lamb, and veal should reach 160°F; and poultry should reach 165°F.
A thermometer gives you information that your eyes simply can't provide.
Instead of asking, "Does this look done?" you can ask a much more useful question:
"What temperature has the center actually reached?"
A digital meat thermometer is a kitchen tool that uses a temperature-sensitive probe to measure the internal temperature of food and display the result on a digital screen.
Most models have three basic parts:
Some are designed for quick spot checks. Others have longer probes, wired sensors, or features intended for oven or grill cooking.
The basic principle remains the same: insert the probe into the food, wait for the reading to stabilize according to the thermometer's instructions, and compare the temperature with the appropriate target.
The process takes very little time once you become familiar with it.
You don't need to check the temperature every few seconds.
Timing matters.
For many foods, it's useful to begin checking as you approach the expected finishing point. If you check too early, you may lose heat unnecessarily while repeatedly opening an oven or grill.
For example, if a roast normally takes much longer to cook than a thin pork chop, you might check the roast periodically near the expected end of cooking while checking a thin chop closer to the point when you expect it to be done.
Cooking time is only an estimate.
Factors such as thickness, starting temperature, oven performance, grill temperature, pan type, and the amount of food being cooked can all affect how quickly meat reaches its target temperature.
That's why experienced cooks use time as a guide and temperature as a confirmation.
Before using your digital meat thermometer, make sure it's clean and ready.
Wash the probe according to the manufacturer's instructions before and after use.
Turn the thermometer on and confirm that the display is functioning properly.
If your model requires a particular setting, select the appropriate temperature unit or mode.
Some thermometers allow you to switch between Fahrenheit and Celsius. Make sure you're reading the correct unit before comparing the number with your recipe or food-safety guidance.
It sounds obvious, but confusing 160°F with 160°C would produce a very different result.
The thickest portion is usually the most important place to measure.
Why?
Heat reaches the center of a thick piece of meat more slowly than the outside. If the center reaches the required temperature, you're getting a much more meaningful measurement than you would from a thin edge.
For a chicken breast, for example, the thickest part is generally more useful to measure than the thin end.
For a steak or roast, aim for the center of the thickest section.
For burgers and other ground-meat patties, insert the probe through the side toward the center when possible. This helps you position the sensing area in the middle rather than stopping near the surface.
Correct placement is one of the most important parts of using a digital meat thermometer.
Insert the probe into the thickest part of the food.
Avoid touching:
A bone or hot cooking surface can influence the reading and give you a temperature that doesn't accurately represent the surrounding meat.
For thick foods, insert the probe deeply enough for the sensor area to sit near the center.
If you're working with a thin piece of meat, insert the probe from the side rather than straight down from the top. This makes it easier to position the sensing area in the middle.
Different thermometers respond at different speeds.
Some digital models provide a reading within seconds. Others may take longer.
Don't immediately pull the probe out just because a number appears on the screen.
Follow the manufacturer's instructions for obtaining a stable reading.
Once the temperature settles, note the number.
If you're unsure whether the probe is positioned correctly, move it slightly within the thickest portion and check again.
The goal isn't simply to find the highest number.
You want a representative reading from the center of the food.
Large roasts and irregularly shaped pieces of meat may not heat evenly.
One part could be hotter than another.
For a large piece, check multiple areas, especially if the shape is uneven.
The coolest reading is often the most important one when you're checking whether the food has reached a required minimum internal temperature.
This approach can also help you understand how your particular oven, grill, or cooking method distributes heat.
Over time, you may notice patterns.
Perhaps the side closest to the oven wall cooks faster.
Maybe the center of your grill runs hotter.
Temperature checks can reveal these differences.
When cooking meat, always follow the appropriate food-safety guidance for the food you're preparing.
Here are several USDA minimum internal temperatures:
| Food | Minimum Internal Temperature |
|---|---|
| Beef, pork, lamb & veal steaks, chops, roasts | 145°F (62.8°C) + 3-minute rest |
| Ground beef, pork, lamb & veal | 160°F (71.1°C) |
| Poultry, including chicken and turkey | 165°F (73.9°C) |
These are minimum temperatures for the categories listed above, not universal targets for every recipe or cooking preference.
Recipes may call for different temperatures for quality or personal preference, but food-safety requirements should always take priority.
Many cooks use color as their main indicator of doneness.
It's understandable.
A burger that looks brown seems cooked. A chicken breast that has turned white appears ready. A steak with a particular color inside may seem to indicate a specific level of doneness.
But color isn't a reliable substitute for temperature.
Meat can change color for several reasons, and visual appearance doesn't tell you the exact internal temperature.
A thermometer provides a measurement rather than an impression.
That makes it particularly useful for ground meats and poultry, where reaching the appropriate internal temperature is important for food safety.
Cutting into meat to check its center can cause several problems.
First, you lose juices.
Second, you create a larger opening through which heat can escape.
Third, you're still relying on visual judgment.
A quick temperature check with a thermometer gives you useful information without requiring you to slice the meat open.
For steaks, roasts, and other meats where retaining moisture matters, this can be particularly helpful.
One small probe opening is usually far less disruptive than cutting the food in half to see what it looks like.
Food safety isn't the only reason to use a thermometer.
It can also improve quality.
Many people cook meat longer than necessary because they aren't confident that it has reached the desired temperature.
That extra cooking time can turn juicy meat into something dry and chewy.
With a temperature reading, you don't have to keep guessing.
Once the meat reaches the appropriate target, you know it's time to move to the next step.
This is especially helpful with expensive cuts of meat.
A thermometer won't guarantee a perfect steak, but it can remove one major variable from the cooking process.
Some meats continue to rise in temperature after you remove them from the heat.
This is known as carryover cooking.
The effect varies depending on the size and shape of the food, cooking method, and other factors.
For this reason, don't automatically assume that the temperature you see immediately after removing a large roast will remain unchanged.
Follow a reliable recipe and food-safety guidance for the specific food you're preparing.
For USDA guidance, whole cuts of beef, pork, lamb, and veal should reach 145°F before removal from heat and then rest for at least three minutes.
For foods with specific recipe targets, allow for the cooking method and resting period described by the recipe.
Grilling introduces another challenge: intense heat from below.
The outside of meat can brown quickly while the center remains cooler.
That's where temperature checks become especially useful.
When grilling:
Try to keep the lid closed as much as possible between checks.
Repeatedly opening the grill can affect cooking temperature and increase cooking time.
Oven cooking tends to be more predictable than grilling, but temperature still varies between foods.
A roast may take longer than expected.
A chicken breast may cook faster than the recipe suggests.
An oven may also have hot and cool areas.
When checking oven-cooked meat, carefully remove the rack or pan enough to insert the probe safely, or use an oven-safe probe if your thermometer is designed for that purpose.
Avoid letting a non-oven-safe thermometer remain inside the oven.
Always follow the manufacturer's instructions.
Ground meat deserves particular attention because grinding distributes material throughout the mixture.
For ground beef, pork, lamb, and veal, USDA guidance calls for a minimum internal temperature of 160°F.
Insert the thermometer into the side of a burger toward the center.
If the patty is thin, the side-entry method makes it easier to get the probe into the middle.
Check multiple patties when you're cooking several at once, especially if they differ in thickness or are positioned in different parts of the cooking surface.
Chicken is another situation where a thermometer is extremely useful.
Poultry should reach 165°F internally according to USDA guidance.
The thickest part of a chicken breast or other large piece should be checked carefully.
Avoid touching the bone when taking the measurement.
If you're cooking multiple pieces, check the larger or thicker pieces and verify that the food has reached the appropriate minimum temperature.
Don't rely solely on whether the outside looks white or browned.
Pork is another meat where a thermometer can make cooking more predictable.
USDA guidance recommends a minimum internal temperature of 145°F for whole cuts such as pork steaks, chops, and roasts, followed by at least a three-minute rest. Ground pork should reach 160°F.
Different cuts can require different cooking approaches, so use the thermometer together with a recipe appropriate for the specific cut.
A thermometer can move between raw and cooked food, so cleanliness matters.
After checking raw meat, clean and sanitize the probe appropriately before using it on cooked food or another ready-to-eat item.
Don't place a contaminated thermometer on the counter and then use it again without cleaning it.
A simple habit helps:
Check → clean the probe → continue cooking or serving.
Keeping a clean paper towel or appropriate cleaning supplies nearby can make this easier during busy cooking sessions.
Accuracy matters.
A thermometer that consistently gives incorrect readings can undermine the entire reason for using one.
Some models can be calibrated, while others simply require accuracy checks according to the manufacturer's instructions.
If you suspect your thermometer isn't reading correctly, consult its manual for the recommended testing method.
Don't ignore a thermometer that suddenly begins producing unusual readings.
A damaged probe, depleted battery, or other issue can affect performance.
The surface heats much faster than the middle.
Bone can interfere with the measurement.
You may measure the cooking surface rather than the meat.
Large pieces can cook unevenly.
Time is an estimate. Internal temperature provides a direct measurement.
Cross-contamination can occur when a probe moves between raw and cooked foods without proper cleaning.
Only leave a thermometer inside the oven if its manufacturer specifically says it's designed for that use.
Make sure you're reading Fahrenheit or Celsius correctly.
Once you've learned the basics, a few habits can make your results even better.
Meat with similar thickness tends to cook more consistently.
Check efficiently and close the cooking chamber again.
If a particular steak thickness reaches your preferred result at a certain temperature, remember that information for future meals.
Combine the thermometer reading with the recipe, cooking method, and resting instructions.
Resting can improve the final texture and allows the temperature to settle.
If you're choosing a thermometer, focus on features that actually make cooking easier.
A quick response can reduce the time you spend holding the oven or grill open.
A clear screen helps you read the temperature quickly.
Make sure it can measure the temperatures you'll encounter in your cooking.
The probe should be designed for food use and regular kitchen handling.
A smooth probe is generally easier to clean thoroughly.
Some models are designed to resist water exposure, which can be convenient when cleaning. Check the manufacturer's rating rather than assuming a thermometer is waterproof.
Certain models provide alarms when a target temperature is reached. These can be helpful for longer cooking sessions.
Insert the probe far enough into the thickest portion for the sensing area to reach the center. On thin foods, inserting from the side can make this easier.
Only if the thermometer is specifically designed and rated for continuous cooking or oven use. Check the manufacturer's instructions before leaving it in the food.
Yes. Check near the expected finishing point so you can determine whether it has reached the appropriate temperature without unnecessarily extending the cooking time.
A properly functioning thermometer provides an actual temperature reading, whereas color and appearance can vary and don't reliably tell you the internal temperature.
Different areas can heat at different rates. Large or irregularly shaped foods may have temperature differences between the center, edges, and areas near bones.
Yes, provided you clean and sanitize the probe properly between uses to prevent cross-contamination.
The probe should be cleaned appropriately after contact with raw meat and before it touches cooked or ready-to-eat food.
Many food thermometers can measure temperatures in other foods, but check the manufacturer's instructions and temperature range before doing so.
Learning how to use a digital meat thermometer can change the way you approach cooking.
Instead of depending entirely on appearance, cooking time, or guesswork, you can check what is actually happening inside the food.
The process is simple: prepare the thermometer, identify the thickest portion, insert the probe correctly, wait for a stable reading, and compare it with the appropriate temperature guidance for the food you're preparing.
Use the thermometer carefully around bones, pans, grill grates, and thin pieces of meat. Check multiple areas when necessary, keep the probe clean, and make sure the thermometer itself is functioning properly.
Most importantly, use reliable food-safety temperatures rather than relying on appearance alone. USDA guidance recommends 145°F with a three-minute rest for whole cuts of beef, pork, lamb, and veal; 160°F for ground beef, pork, lamb, and veal; and 165°F for poultry.
Once temperature checking becomes part of your normal cooking routine, you'll likely find yourself guessing less and cooking with much more confidence.
And that is the real benefit of a good thermometer: you spend less time wondering whether your meat is ready and more time enjoying the meal you've prepared.