English
 Arabic
 French
 Spanish
 Portuguese
 Deutsch
 Turkish
 Dutch
Dutch
 Italiano
 Russian
 Romaian
 Portuguese (Brazil)
 Greek
Greek
Advanced Intimate Lingerie Market Developments for Enhanced Comfort and Style
Other |
2026-07-17 11:36:25
 Social Networth OS
 Creator Commerce
 Launch Startup
 Global News
 Creator Award
 Talkfever App
Afiseaza-i pe toti
Talkfever App
Afiseaza-i pe toti

Upgrade to Pro
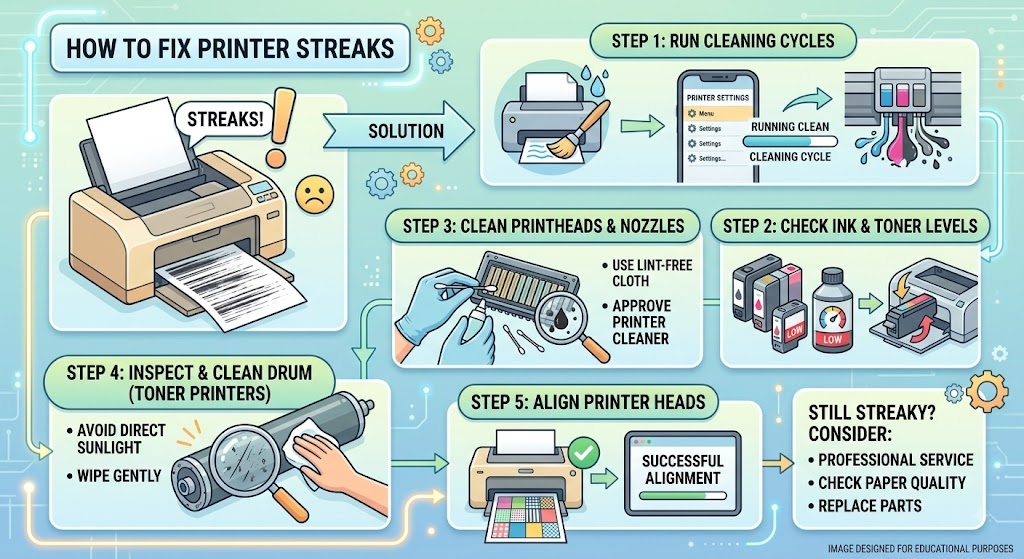
Printer streaks can make documents, photos, and other printouts look messy or difficult to read. Lines, smudges, faded areas, or repeated marks usually indicate a problem with the ink or toner, printhead, cartridge, paper, or printer settings. Fortunately, many printer streaking problems can be fixed at home without professional repair.
A low or unevenly distributed ink or toner supply is one of the most common causes of printer streaks. Check the printer's ink or toner levels through the printer display or computer software. If a cartridge is nearly empty, replace it with a compatible cartridge.
For laser printers, gently removing and shaking the toner cartridge from side to side can sometimes redistribute the toner temporarily. Avoid touching sensitive cartridge components.
Inkjet printers can develop clogged printhead nozzles when the printer has not been used regularly. A clogged printhead may produce horizontal lines, missing sections, or uneven colors.
Use your printer's built-in Printhead Cleaning or Head Cleaning function. This option is usually available through the printer's settings or its companion software. You may need to run the cleaning cycle more than once, but avoid excessive cleaning because it can consume a significant amount of ink.
Misaligned printheads can also cause uneven lines or poor-quality output. Look for a Printhead Alignment or Print Alignment option in your printer settings. The printer will normally print an alignment page and automatically adjust the printhead position.
This is particularly useful if streaks appeared after replacing an ink cartridge or moving the printer.
Dust, loose toner, dried ink, and paper debris can create streaks on printed pages. Turn off the printer and unplug it before cleaning accessible areas. Use a soft, lint-free cloth to remove visible dust and debris.
For laser printers, inspect the toner cartridge and drum unit if they are user-accessible. A damaged or dirty drum can repeatedly produce lines or marks on every page.
Poor-quality, damp, damaged, or incompatible paper can affect print quality. Make sure you are using paper recommended for your printer. Store paper in a dry location and avoid loading sheets that are bent, wrinkled, or stuck together.
Also check the printer driver settings. Selecting the correct paper type and print quality can prevent uneven ink application.
If streaks continue after cleaning, the cartridge itself may be defective. Try replacing the affected ink or toner cartridge with a genuine or high-quality compatible replacement. If the streaks disappear after replacement, the old cartridge was likely responsible.
Printing a test or diagnostic page can help identify the source of the problem. If streaks appear consistently in the same location, the issue may involve the cartridge, drum, rollers, or another internal component.
If cleaning, alignment, paper replacement, and cartridge replacement do not solve the problem, professional printer servicing may be necessary.
Knowing how to fix printer streaks can save time and prevent unnecessary repairs. Start with simple solutions such as checking ink or toner, cleaning the printhead, aligning the printer, and inspecting the paper. For laser printers, also consider the toner cartridge and drum. If the printer continues producing streaked pages despite these steps, an internal hardware problem may require professional attention.